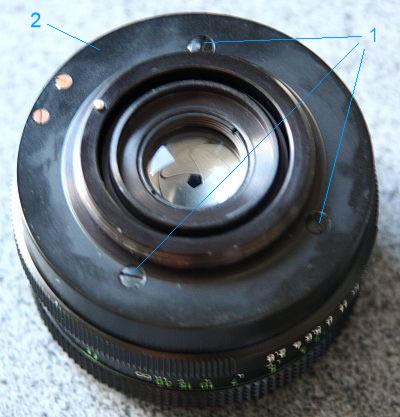
To take appart the lens I started at the bottom, I originaly tought the blades were easily accessible from there.I was wrong, but removing the bottom was a necessary step anyway.
- Unscrew 1
- Remove 2
| 1 | Rear barrel screws |
| 2 | Rear barrel casing |
You can see the first layer of the inside.
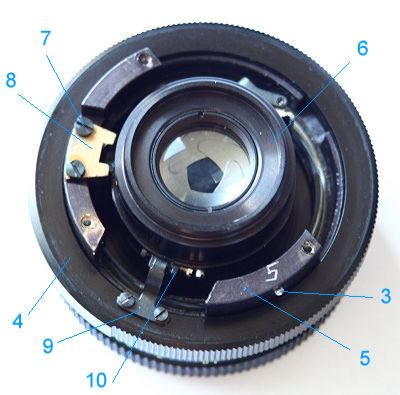
- Be sure to remove carefully 3, it's mounted on a spring.
- Remove 4 as one piece, no need to remove the apperture guide 9 that sticks inside.
- Remove 7 and 8.
- You can unscrew the inside of the focusing barrel 6 from the outside 5.
| 3 | Manual/Auto switch metal stop |
| 4 | Apperture setting ring |
| 5 | Focusing barrel outside |
| 6 | Focusing barrel inside |
| 7 | Focusing barrel guide screws |
| 8 | Focusing barrel guide |
| 9 | Apperture ring guide tab |
| 10 | Appertude guide |
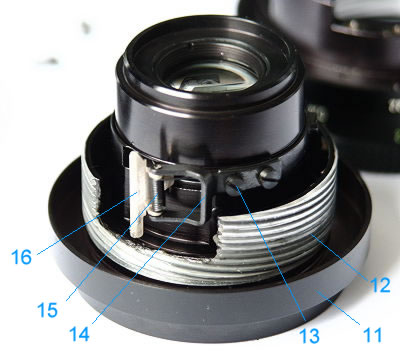
This is the inside barrel 6. Here we can have a good view of the apperture mechanism from 2 windows : one of them is for the automatic apperture control, the second is for the manual control.
One thing to note is that the screws 13 help to position 14 properly, there is some tolerance here and you'll have to remount these in a position where 16 doesn't get stuck or jumps out of it's groove later on.
| 11 | Front Casing |
| 12 | Threaded focusing barrel |
| 13 | Automaric apperture mechanism screws |
| 14 | Automatic apperture mechanism arm |
| 15 | Automatic apperture mechanism spring |
| 16 | Automatic apperture mechanism lever arm |
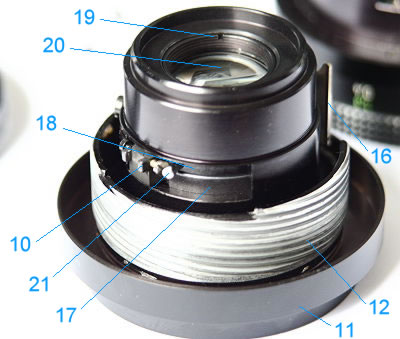
This is from the other side, you can see 10 that is screwed on 18 and is the automatic apperture calibration. You can remove it later, but be sure not to remove the small screws on it, you'd have to redo the infinity calibration etc!
| 17 | Apperture blade holder ring |
| 18 | Automatic apperture control ring |
| 19 | Back Element threaded stopper |
| 20 | Back glass element |
| 21 | Focusing blade holder ring stopper screw |
You can remove the rear elements now.
Here is the view of the rear element. Something to get cleaned. |
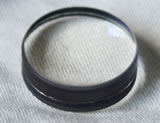 |
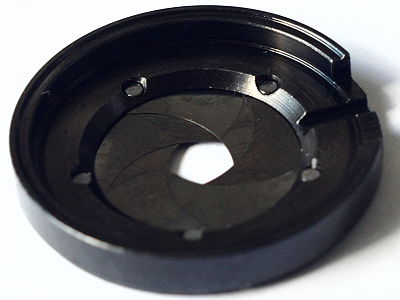
Now from the rear you can see and touch the iris blades. But thats all, thats all you can do from the bottom.
Now we need to attack from the top !
- Unscrew 11 from 12
You might have to use quite some torque to get that done, I used two towels to get a bit more grip.
You can also at this point:
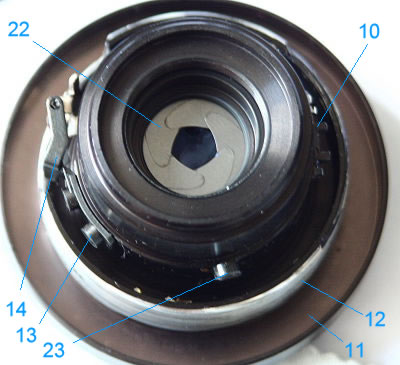
- Unscrew 13
- Remove 14
- Ignore 23, it doesn't needs to be removed
| 22 | Apperture blades | 23 | Focusing guide screw (fits in 8) |
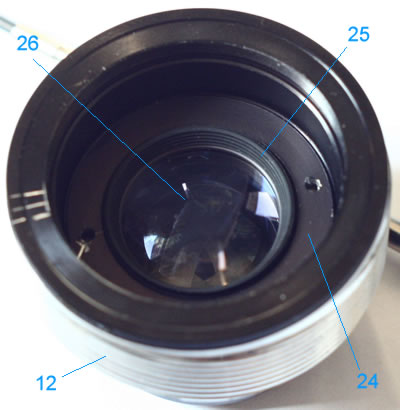
Now we can see whats in the front.
- Unscrew 25
- Remove carefuly 26, to be cleaned
- Unscrew 24
Once again 24 was very very tightly screwed, I hade to use a pincer and quite some force to get it to unscrew.
| 24 | Front Element Support ring and stop for all the rear rings | 25 | Threaded stop for the front element | 26 | Front Element |
| When 24 is removed, you'll have access to the middle lens element. The lens is glued to the ring. Clean that up same way you did the back & front bits. | 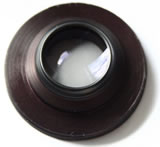 |
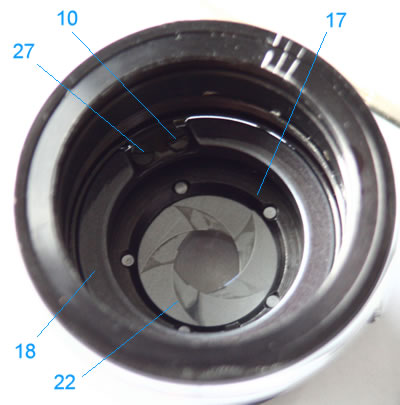
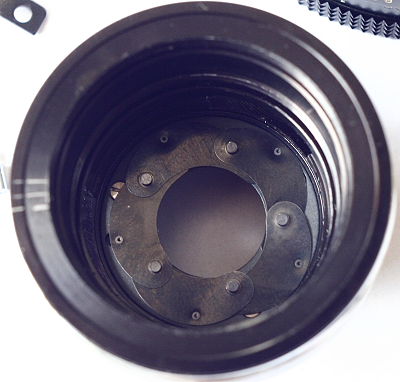
Without the middle element, at last you get access to the iris apparatus.
- Unscrew 27
- Remove 10
- Remove 18
- Remove 21
| 27 | Apperture guide holding screws (screws on 18) |
| Here is a view of whats just been removed. | 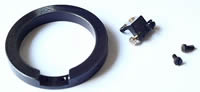 |
Next is a big view of all the bits and pieces at this stage, before we attack the iris proper.

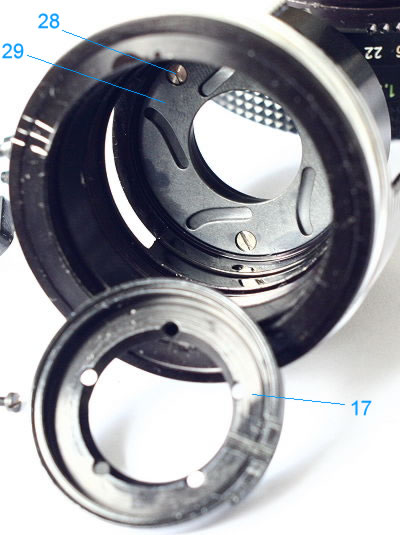
Now its time to remove the iris.
- Remove 17
- Remove the blades 22 (use tweezers, be *careful*)
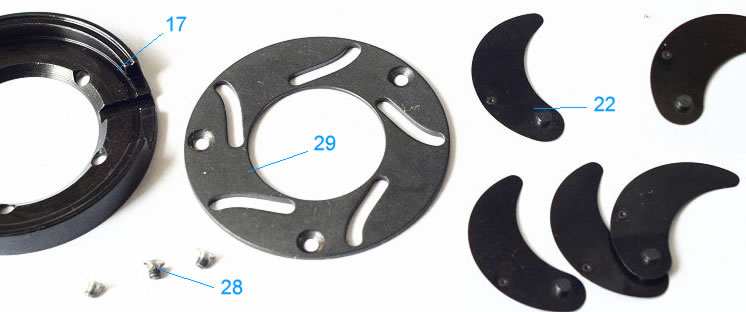
- Unscrew 28
- Remove 29
An interesting point here is that the screw holes for 28 are not in an equilateral triangle, which means you can't go wrong when putting 29 back, Clever!
| 28 | Apperture blades grove ring screws |
| 29 | Apperture blades grove ring |
And there we are, the whole of the lens has been taken appart. Now you dan do the cleaning of each piece.
Once it's clean, I practiced on the table how the heck was I suposed to put back the whole thing together. So here is the iris back in shape, on paper.
Puting it back inside is a bit harder, but you can use tweezers and the side windows in the chamber to position back the blades they should.
The rest of the reinstallation of the front part is very straightforward.

Here is the lens almost completely mounted. Rescrewing the mobile element in the focusing thread can be a bit dodgy. be SURE that you can still focus to both ends after you reinstall the guide. If it doesn't, remove the focusing barell, turn it 1/3 and screw it again using the next thread position.
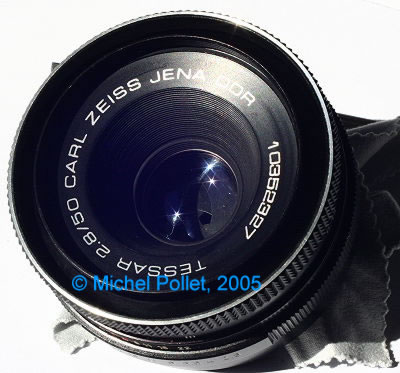
And here is the result, a nice, clean, snappy iris on a nice, clean "as new" old tessar!